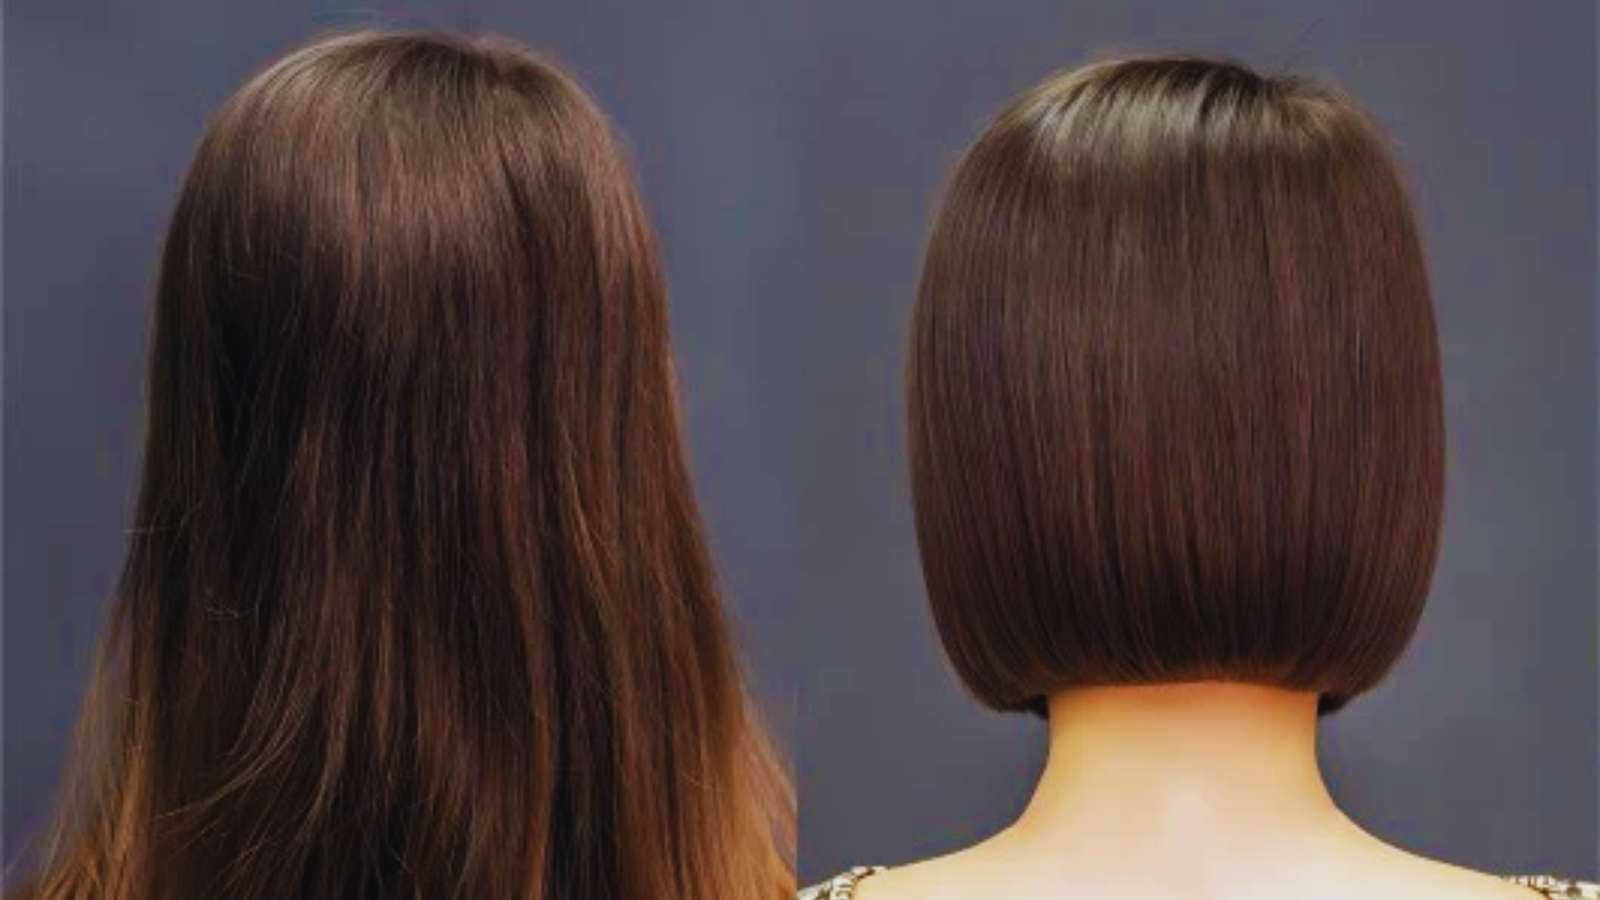


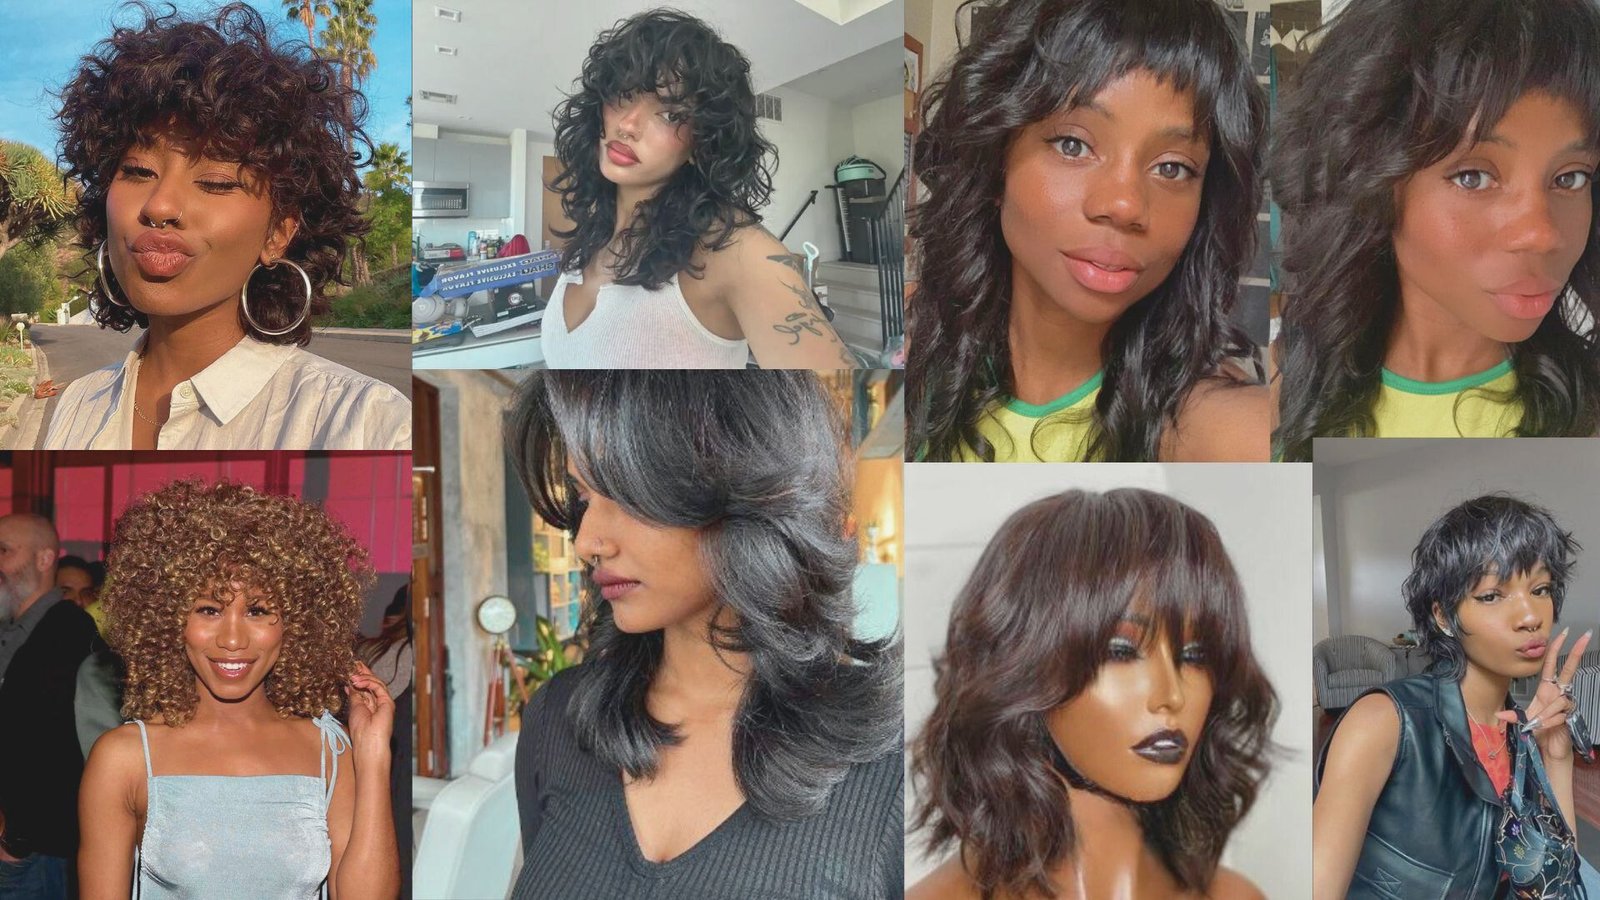

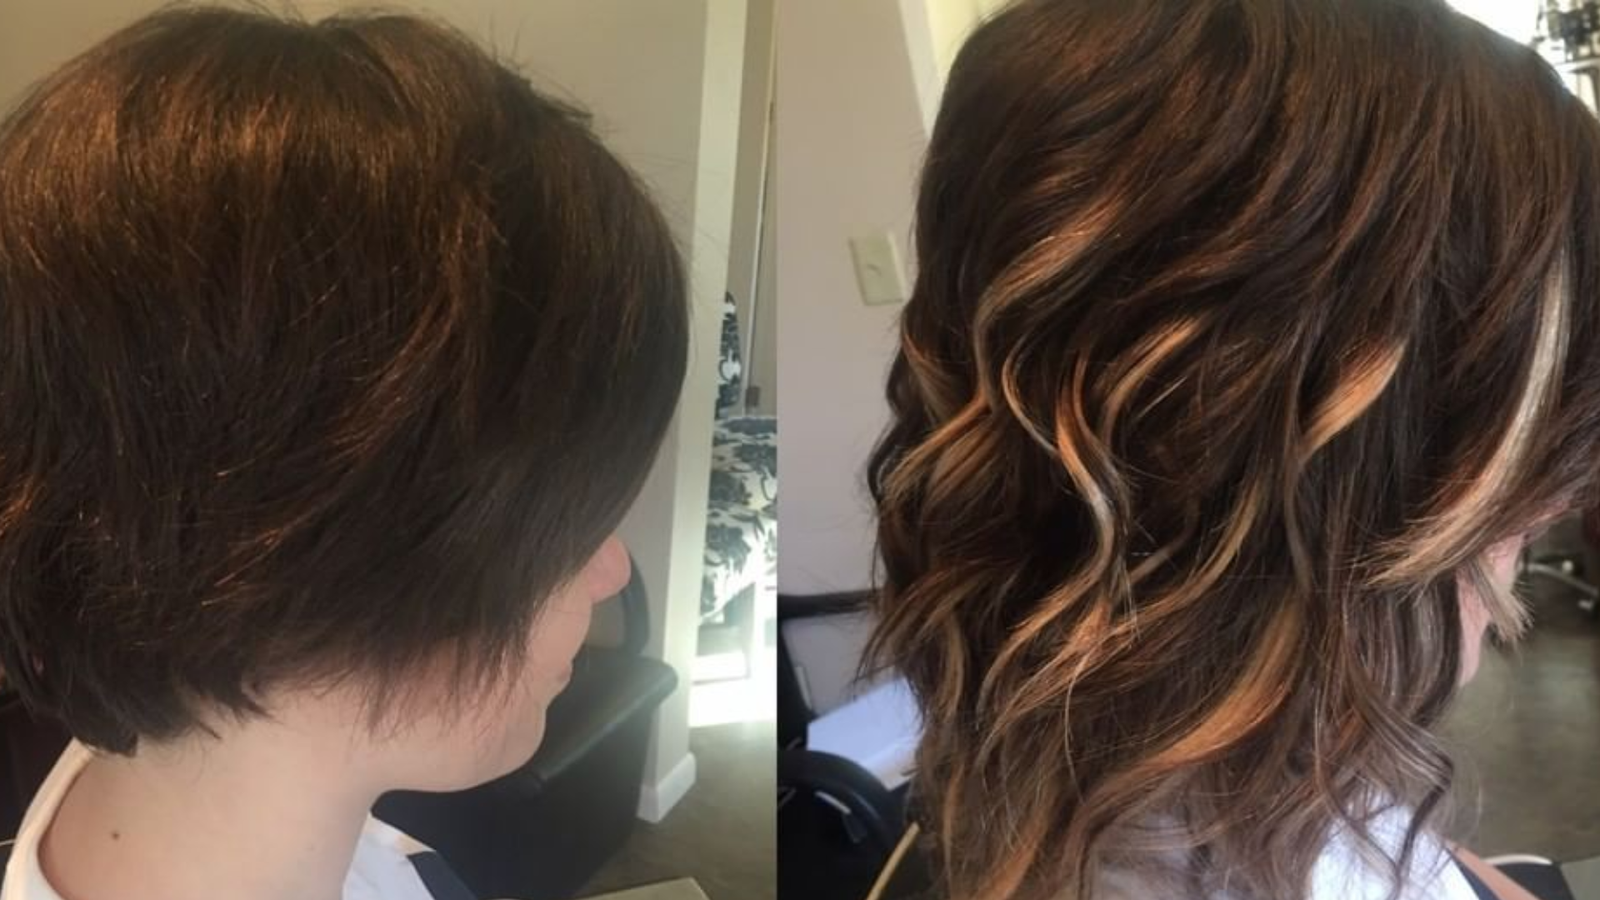
You have short hair but want longer, fuller locks for a special event or a change. The main concern is that extensions may not blend well. Without enough natural length, clips or wefts can show, making the style look obvious.
Extensions can work if your hair is at least three to six inches long. Pixie cuts are usually too short to hide attachments properly. Less natural hair means the extensions can stand out, so choosing the right type and method is key to a smooth, natural look.
This guide explains everything you need to know. You’ll learn how to select extensions for short hair, apply them so clips stay hidden, avoid common mistakes, and keep them secure all day. These techniques help short hair appear longer and fuller while staying natural.
Understanding Minimum Hair Length Requirements
Your hair needs to be at least 3 to 6 inches long for extensions to work. That’s the bare You need a minimum length to attach wefts and hide the attachment points properly. Super short pixie cuts generally won’t work because there isn’t enough natural hair to cover the extensions, which makes them look unnatural.
Most salons require at least six inches for extension applications, though some types can work with three inches. The key is having enough hair to secure the wefts and conceal the clips, bands, or tape beneath your natural layers.
Proper concealment is crucial for a seamless look. Measure your hair from scalp to ends, consider density and thickness, and consult a professional if you are unsure whether your hair can hide the attachment points effectively.
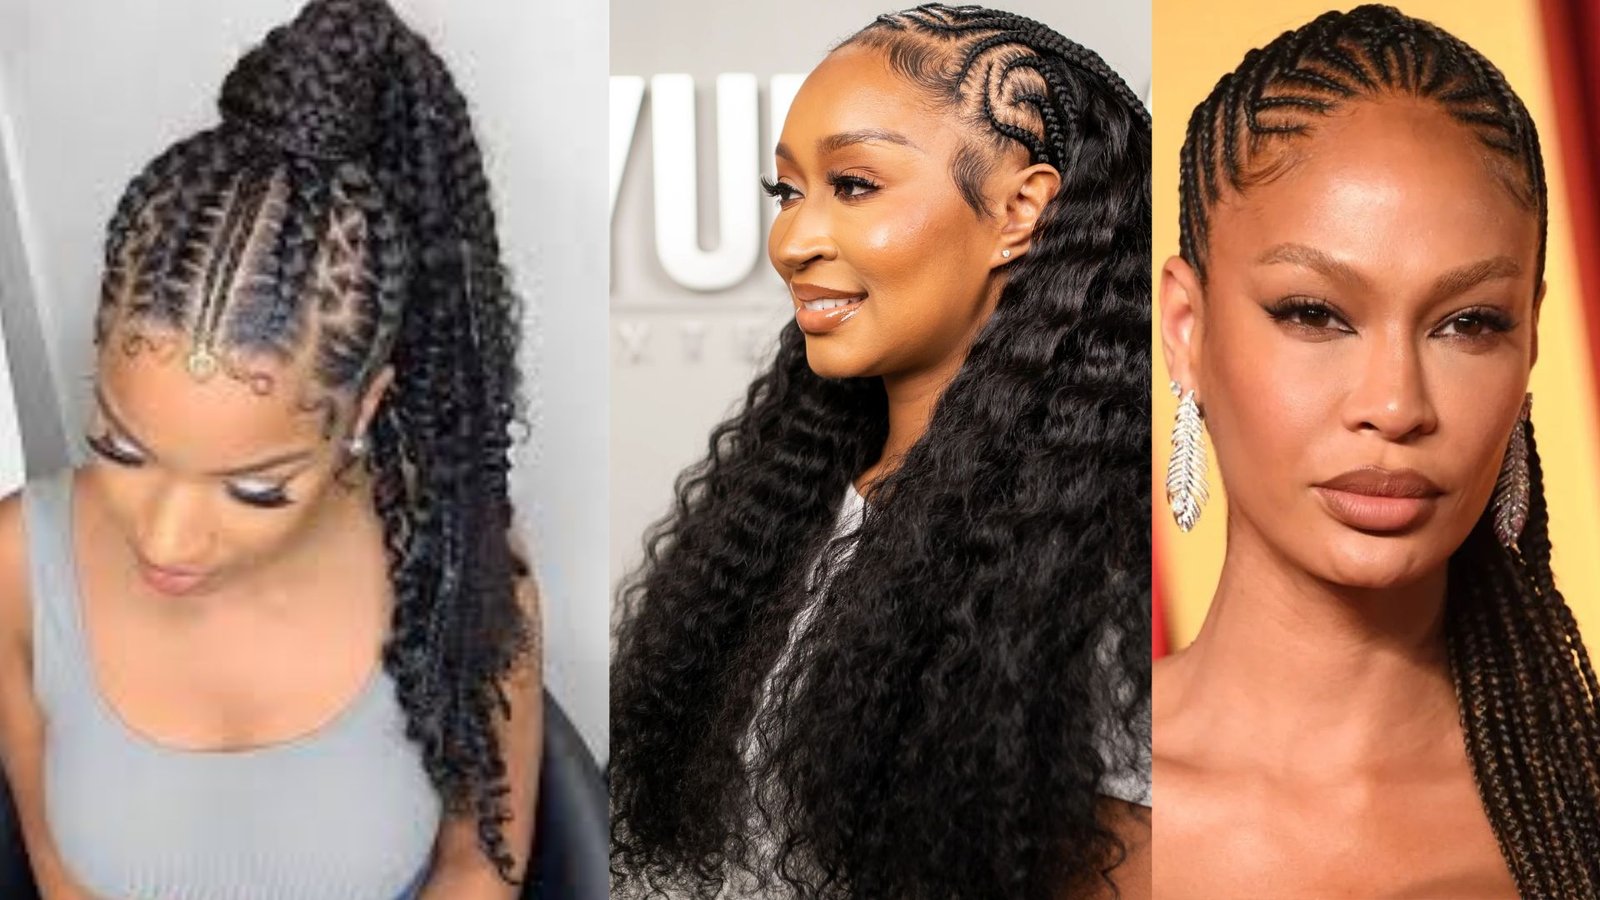
Choosing the Best Extension Types for Very Short Hair
Not all extensions suit short hair; clip-ins and tape-ins work best as they are lightweight, adjustable, and easier to conceal.
Clip-In Extensions
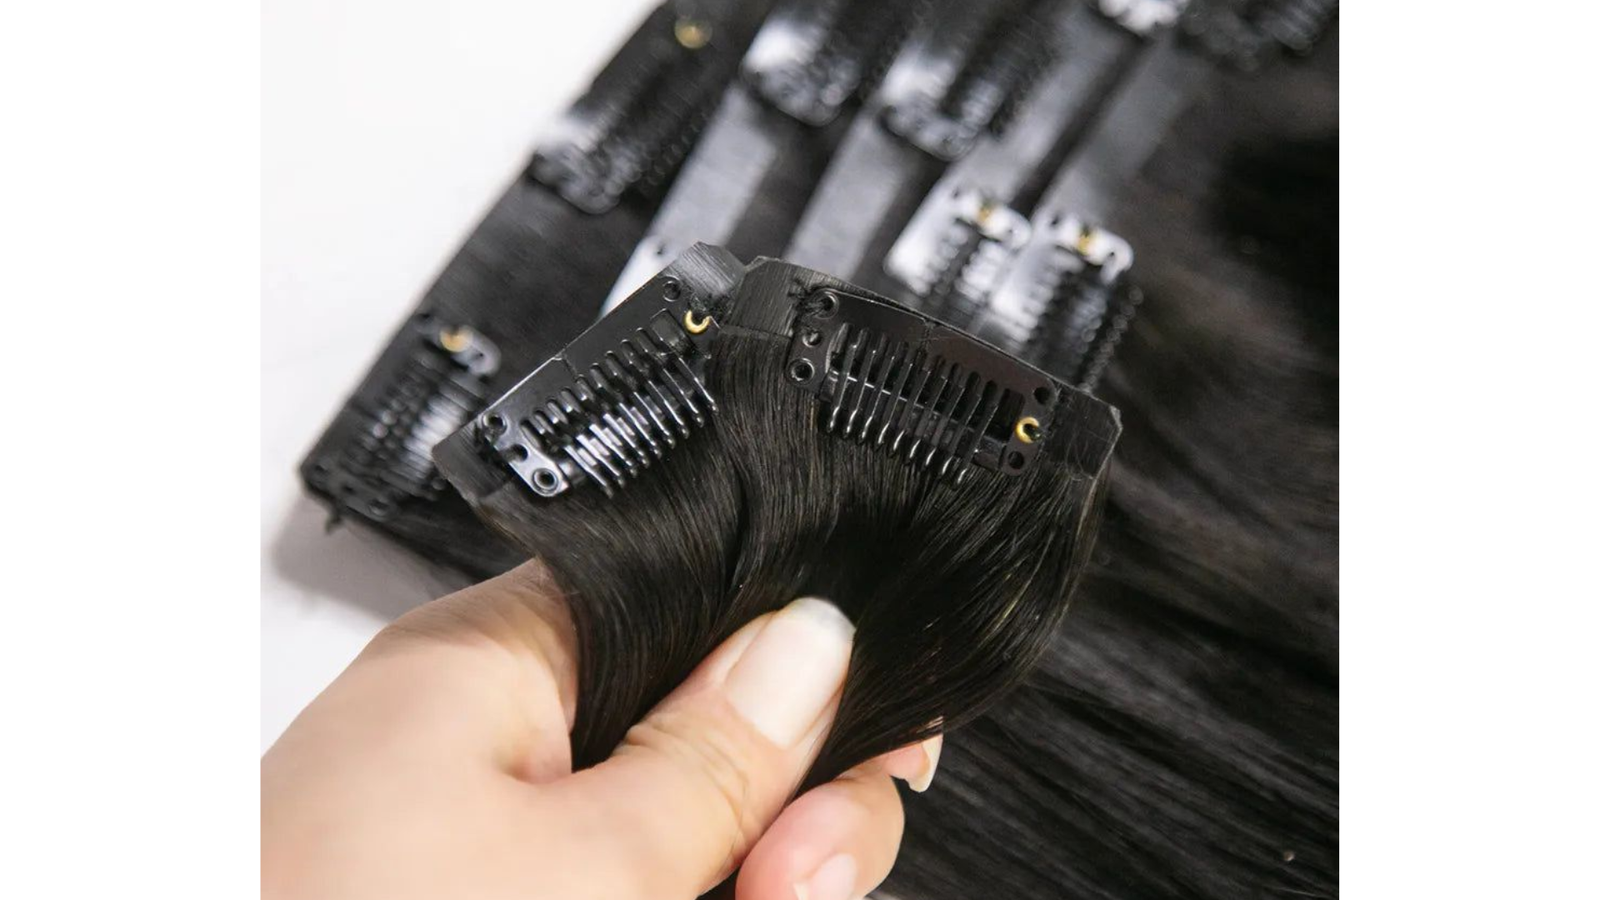
Clip-ins are the best option for very short hair. They’re easy to apply and remove yourself at home.
They’re temporary and adjustable as your hair grows. You can add or remove pieces depending on what you’re doing that day. With the right blending technique, they instantly add length and volume without commitment.
Tape-In Extensions
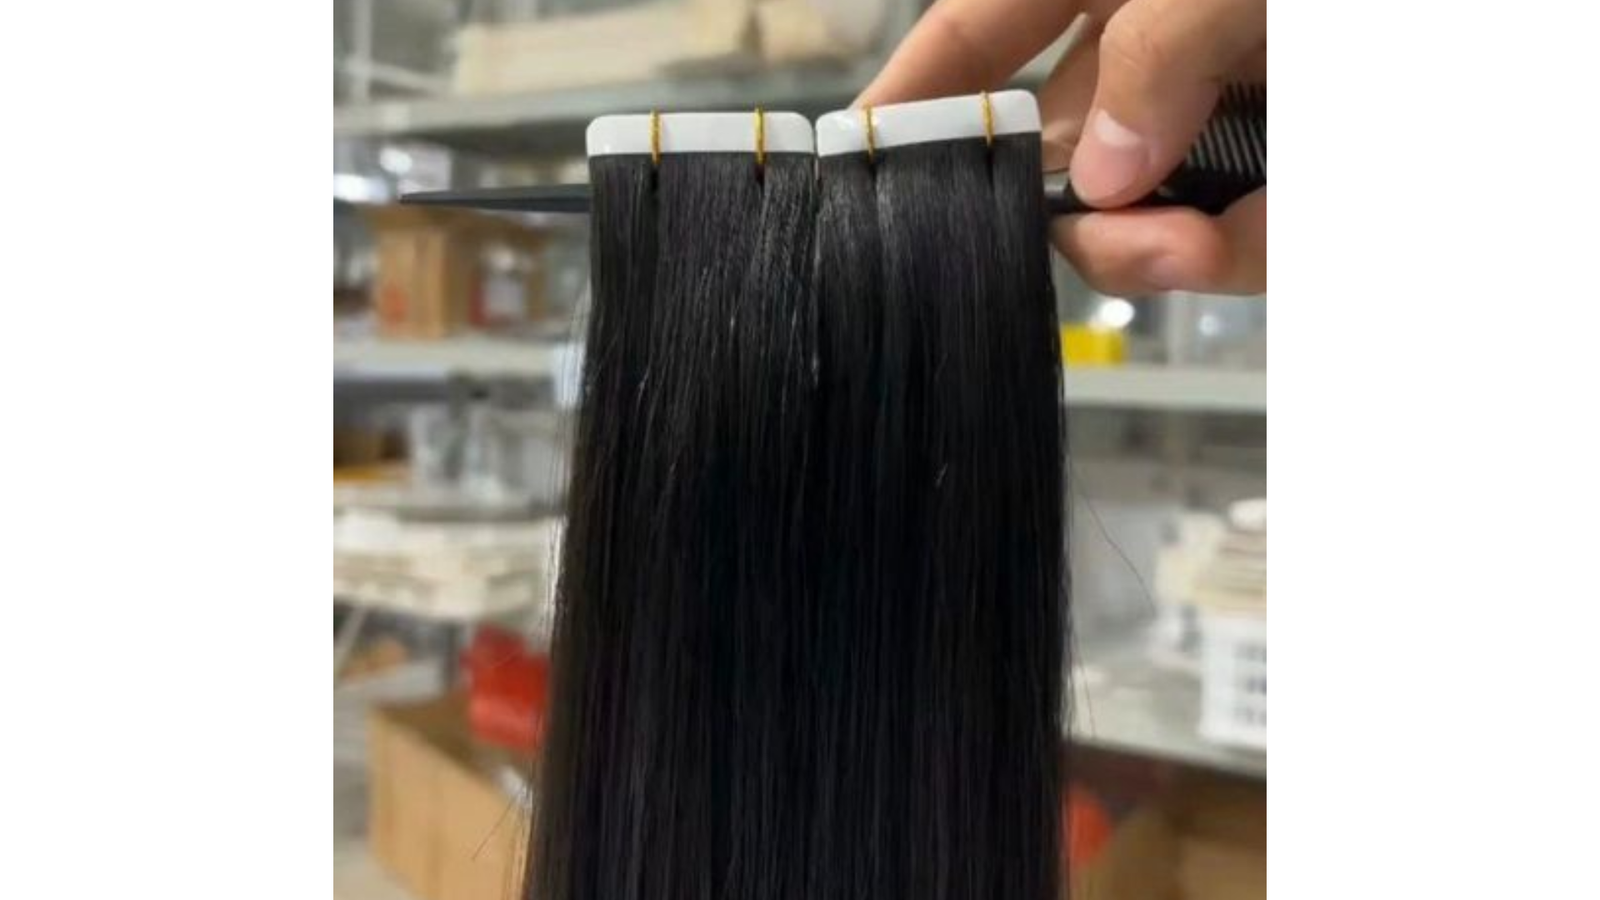
These are lightweight and lie flat against your head. The adhesive tape is thin and easy to conceal, even in short hair.
They work well with very short lengths because they don’t add bulk. A professional application is recommended since placement matters more with less hair to work with. Once they’re in, they’re barely noticeable.
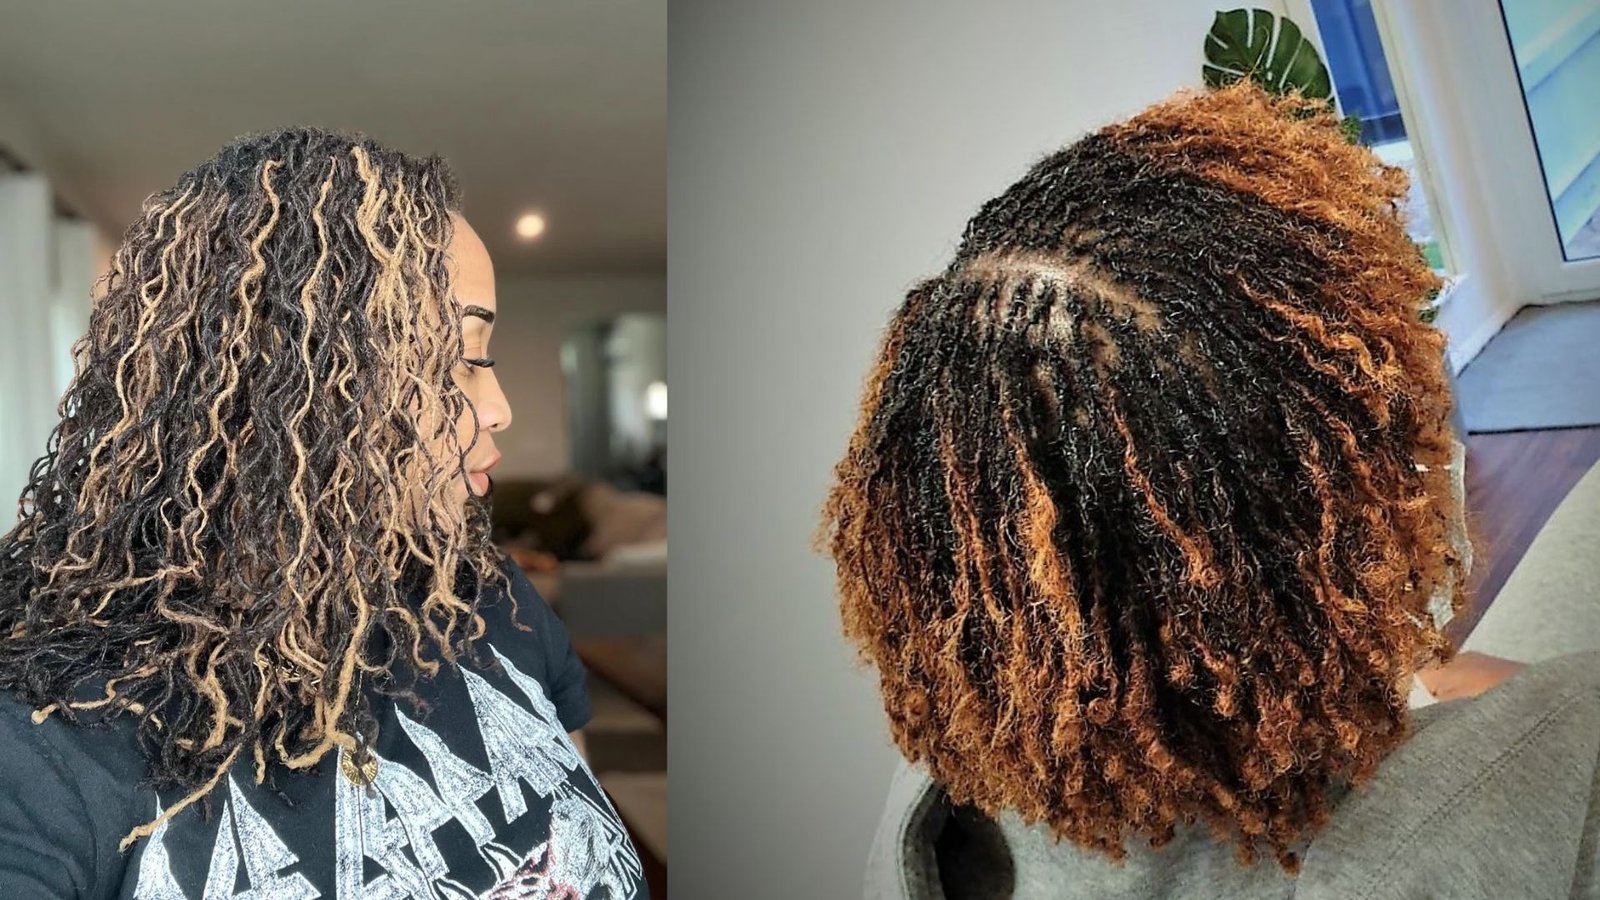
Micro Ring or Mini Micro Ring Extensions
These use naturally discreet attachments that integrate flawlessly with your natural hair. They’re the safest option for growing out short hair.
They loop small strands instead of large strips of hair. Each piece is individual, which creates better blending. The finish is unnoticeable when done correctly.
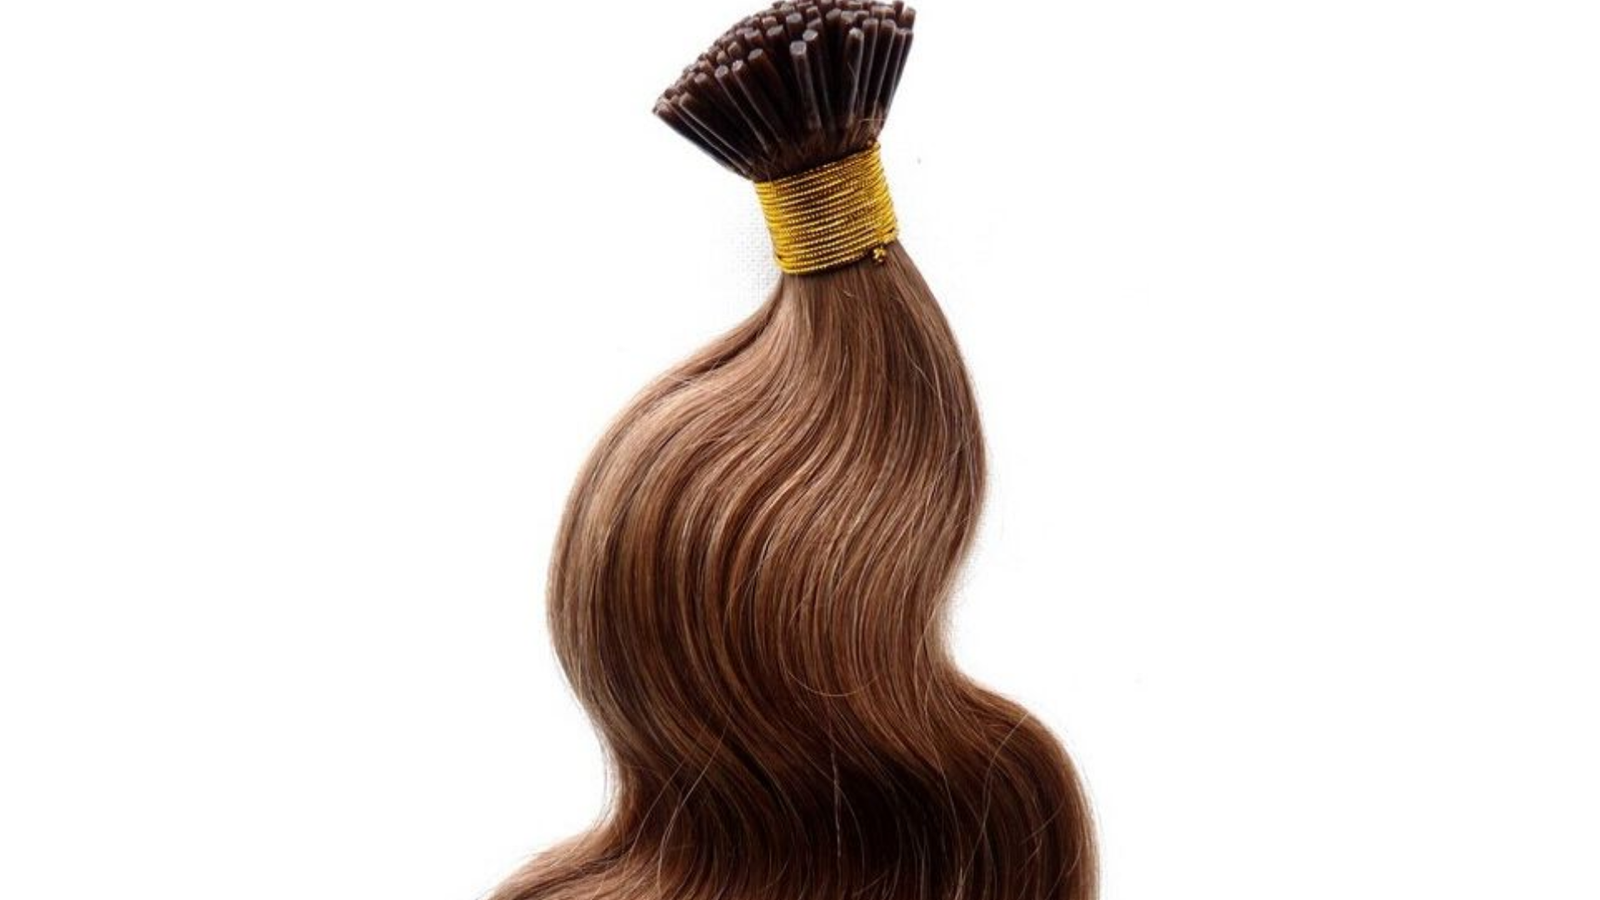
Keratin Bond Extensions
These attach to individual hair strands for more natural movement. The bonds look naturally blended with your hair when applied properly.
They work better for slightly longer short hair rather than very short lengths. The bonds need enough natural hair around them to hide properly. But if you have 5 to 6 inches, they’re a solid choice.
Beaded Weft Extensions
These are positioned close to your scalp and can be adjusted as your hair grows. They create a great finish on short hair when placed correctly.
The beads are small and flat against your head. You can tighten them as your hair grows out, which means they last longer. Good for someone growing out a short cut.
Extensions to Avoid for Very Short Hair
Skip ultra-long extensions. They’re difficult to blend with short hair and create an obvious difference in lengths.
Heavy weft extensions are too noticeable and create bulk. Anything requiring significant natural hair length won’t work. Stick to extensions designed specifically for shorter hair.
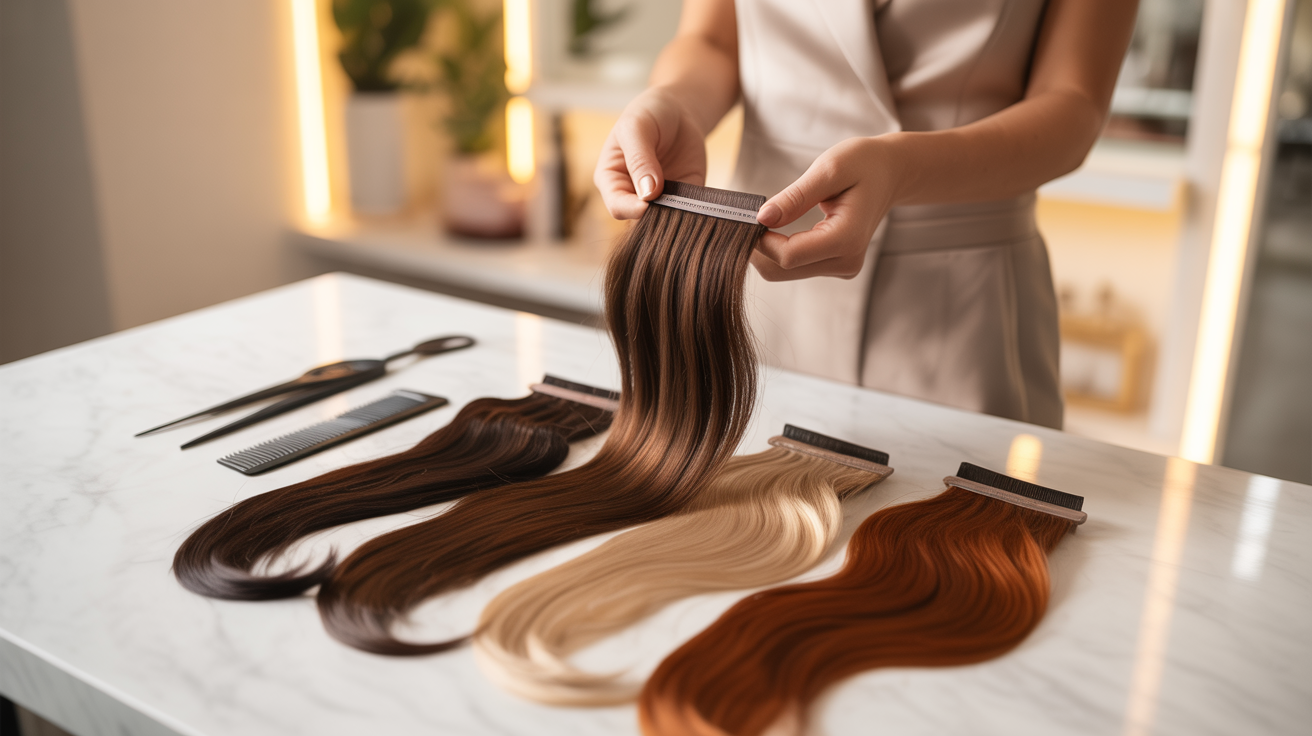
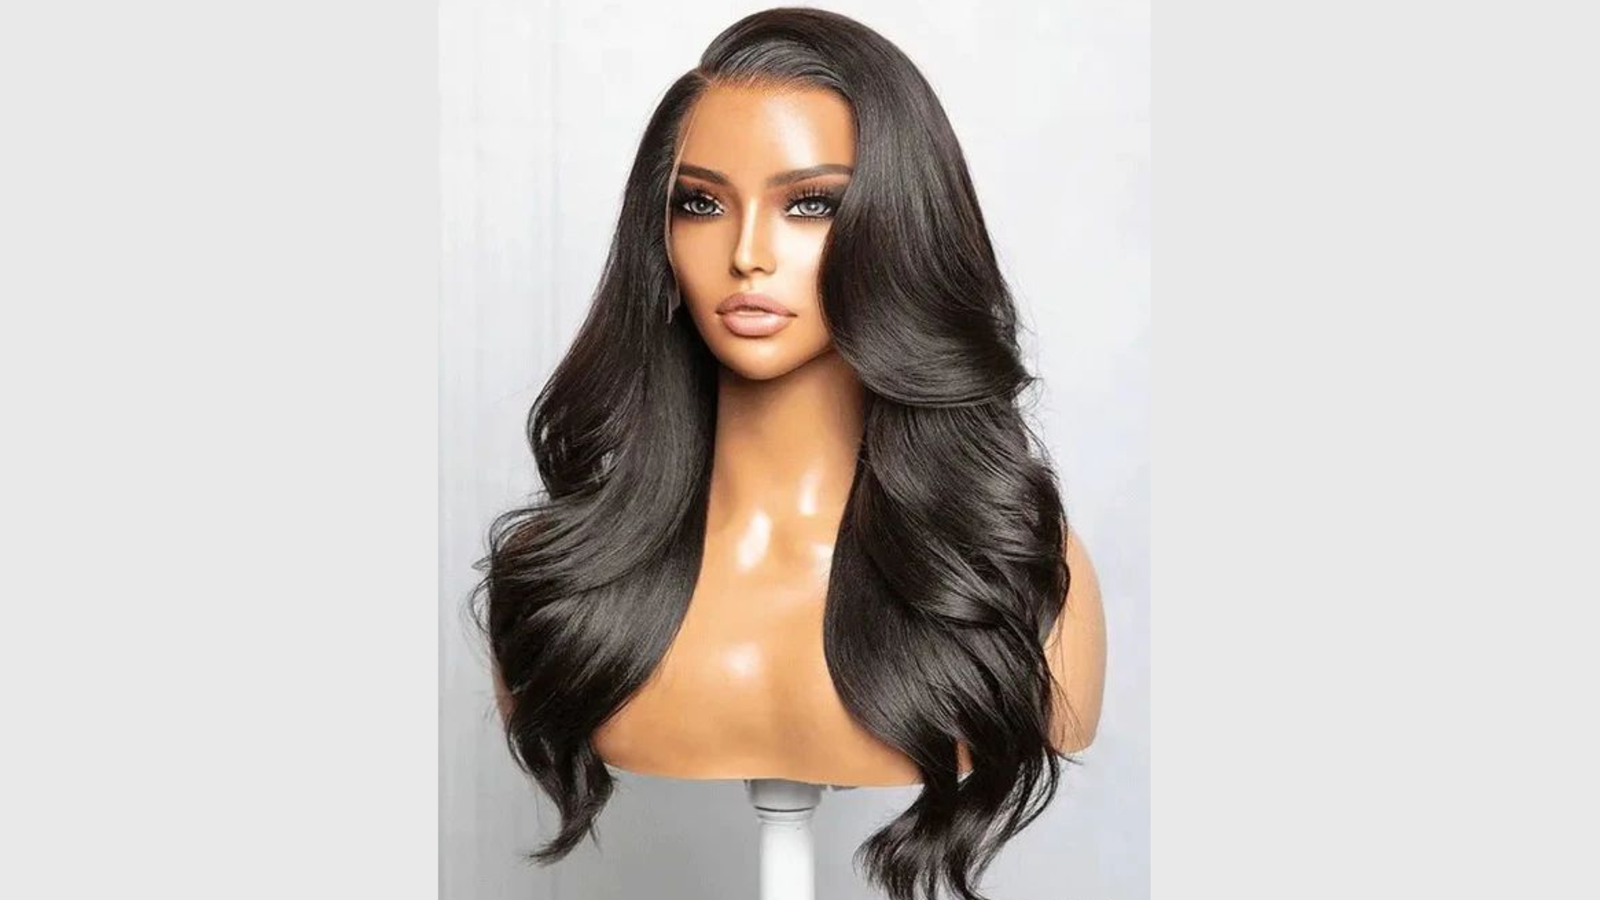
Selecting Extensions That Blend Seamlessly
Blending extensions with short hair is challenging, requiring a close match in color, texture, and length to avoid obvious mismatches.
- Matching Color Precisely: Choose extensions that closely match your natural hair color or get them professionally colored for the best blend
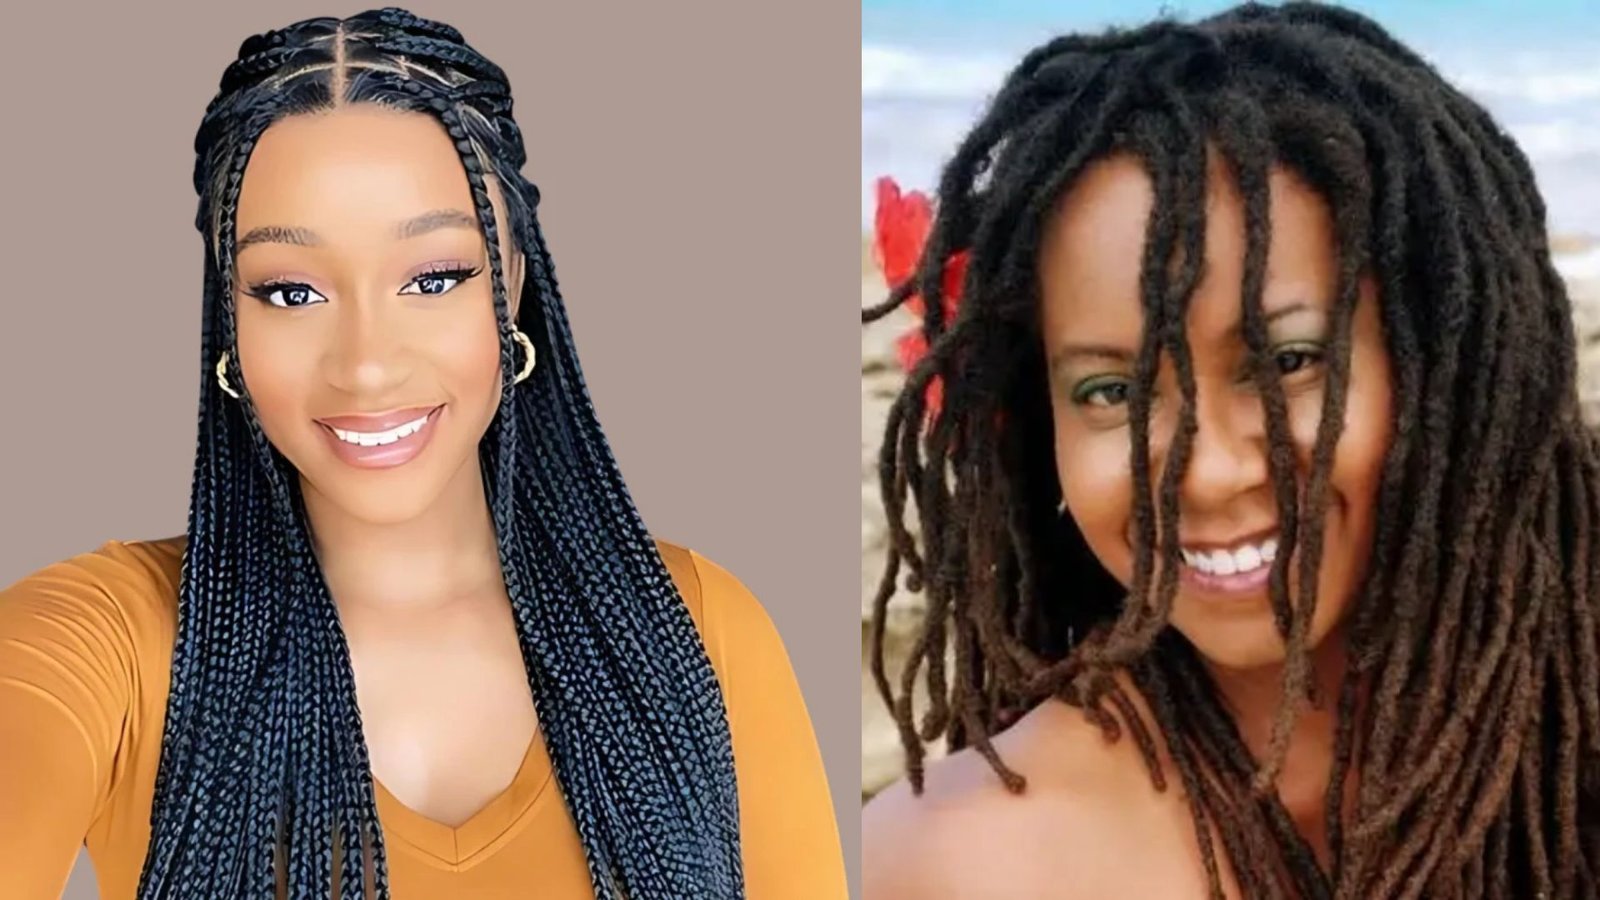
- Matching Hair Texture: Pick a texture that mirrors your natural hair with straight matching straight and curly matching curly, to keep extensions looking natural
- Choosing Appropriate Length: Opt for 12 to 18-inch extensions for short hair to avoid an obvious contrast and ensure a seamless look
- Selecting Quality Extensions: Use 100 percent Remy hair from sources like Russian or Slavic hair for better blend durability and natural movement.
Preparing Your Natural Hair Before Application
Proper preparation is key for extensions, ensuring they stay secure and work well with your hair’s texture and condition.
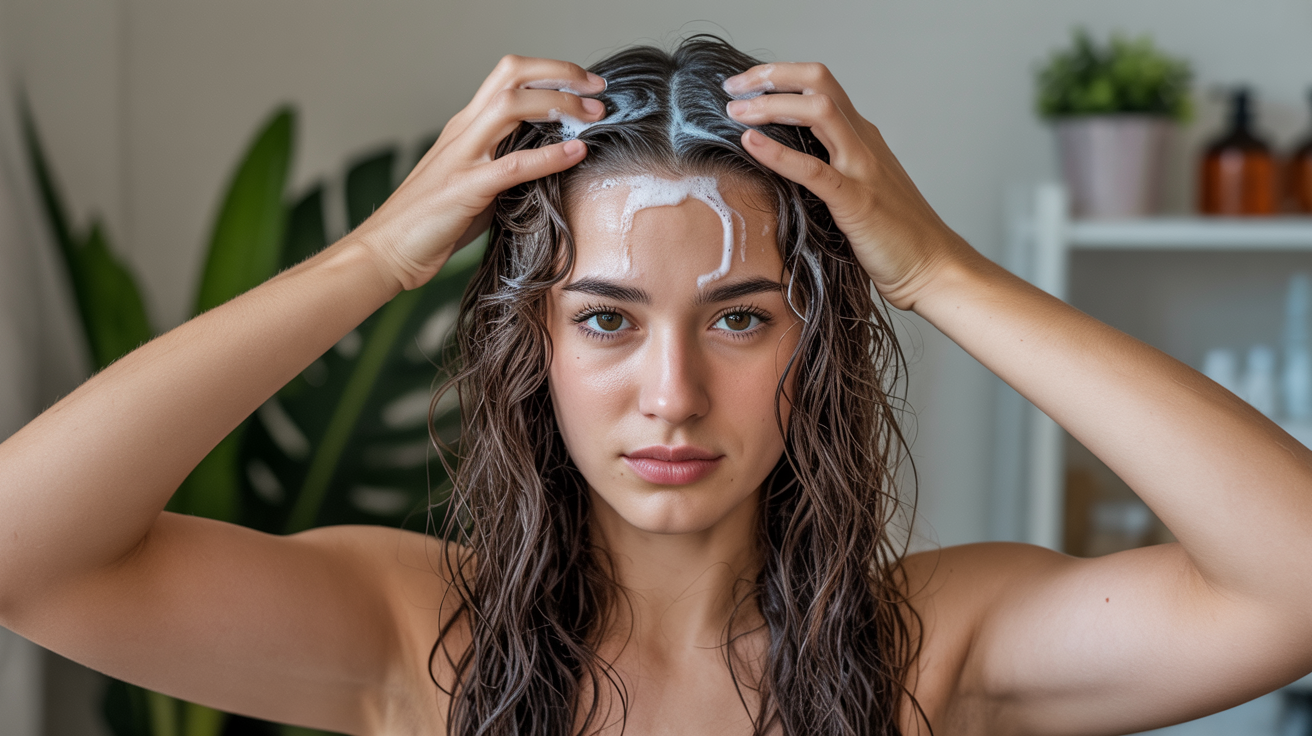
Starting with Clean, Dry Hair

Wash your hair before applying extensions. Make sure it’s completely dry before you start.
Your hair should be tangle-free. Brush thoroughly so you’re working with smooth, manageable hair. Tangles make placement harder and less secure.
Why Dirty Hair Sometimes Works Better

Second or third-day hair has better grip for clip-in extensions. The natural oils and product buildup help clips hold.
Freshly washed hair is too slippery. Clips can slip on thin, fine, clean hair. You need some texture for them to grab onto properly.
Adding Texture for Better Grip

Use texturizing spray on clean hair if you just washed it. Apply hairspray before clipping in extensions.
Dry shampoo adds grip and texture instantly. It creates the same benefits as day-old hair without waiting. Just spray at the roots where clips will attach.
Teasing Hair at Roots

Tease slightly at the root where extensions will attach. This gives clips extra grip and helps them stay secure all day.
It’s a necessary step for very short hair. The teasing creates volume and texture that prevents slipping. Just don’t overdo it, or your hair will look messy.
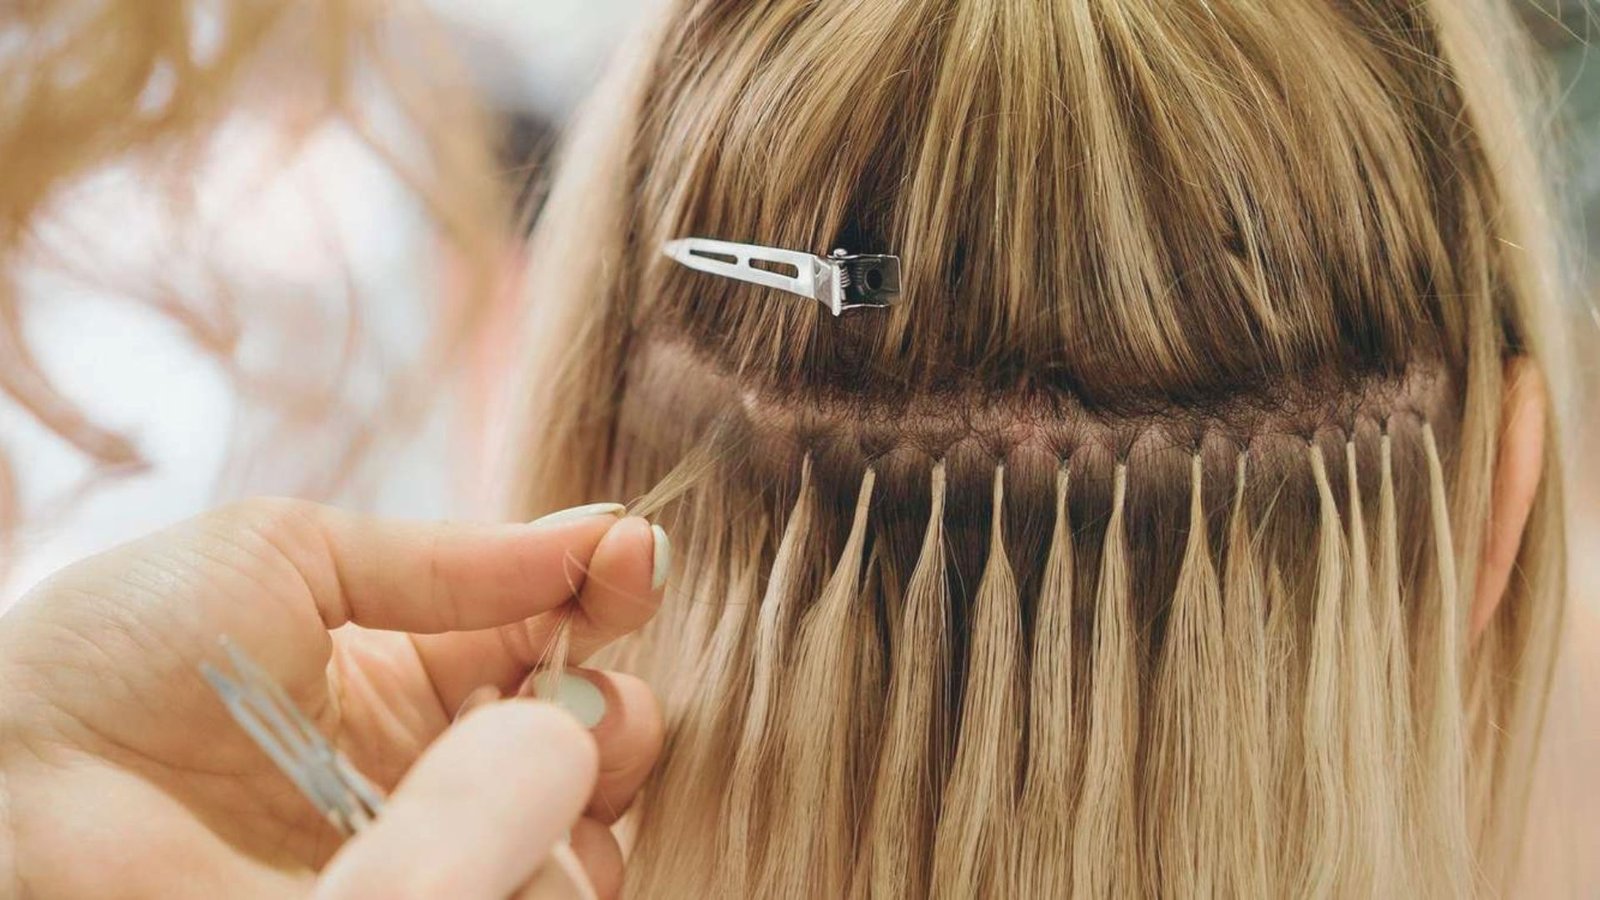
Step-by-Step Application: Hiding Clip-In Extensions in Short Hair
This method is designed for short hair, where careful, step-by-step application prevents visible clips and ensures a natural look.
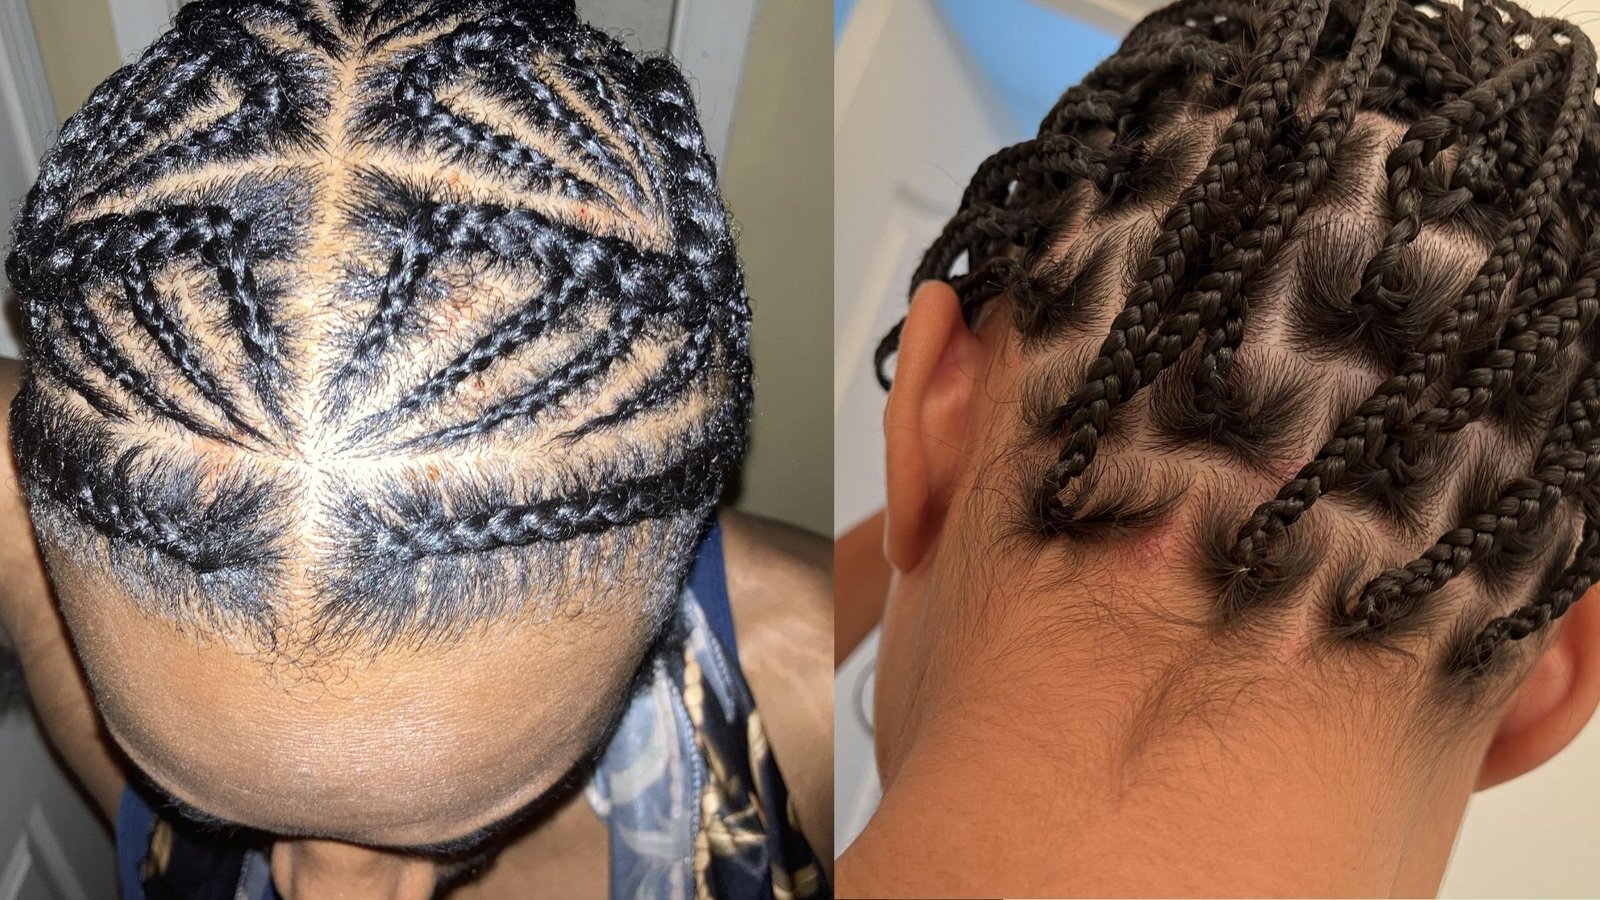
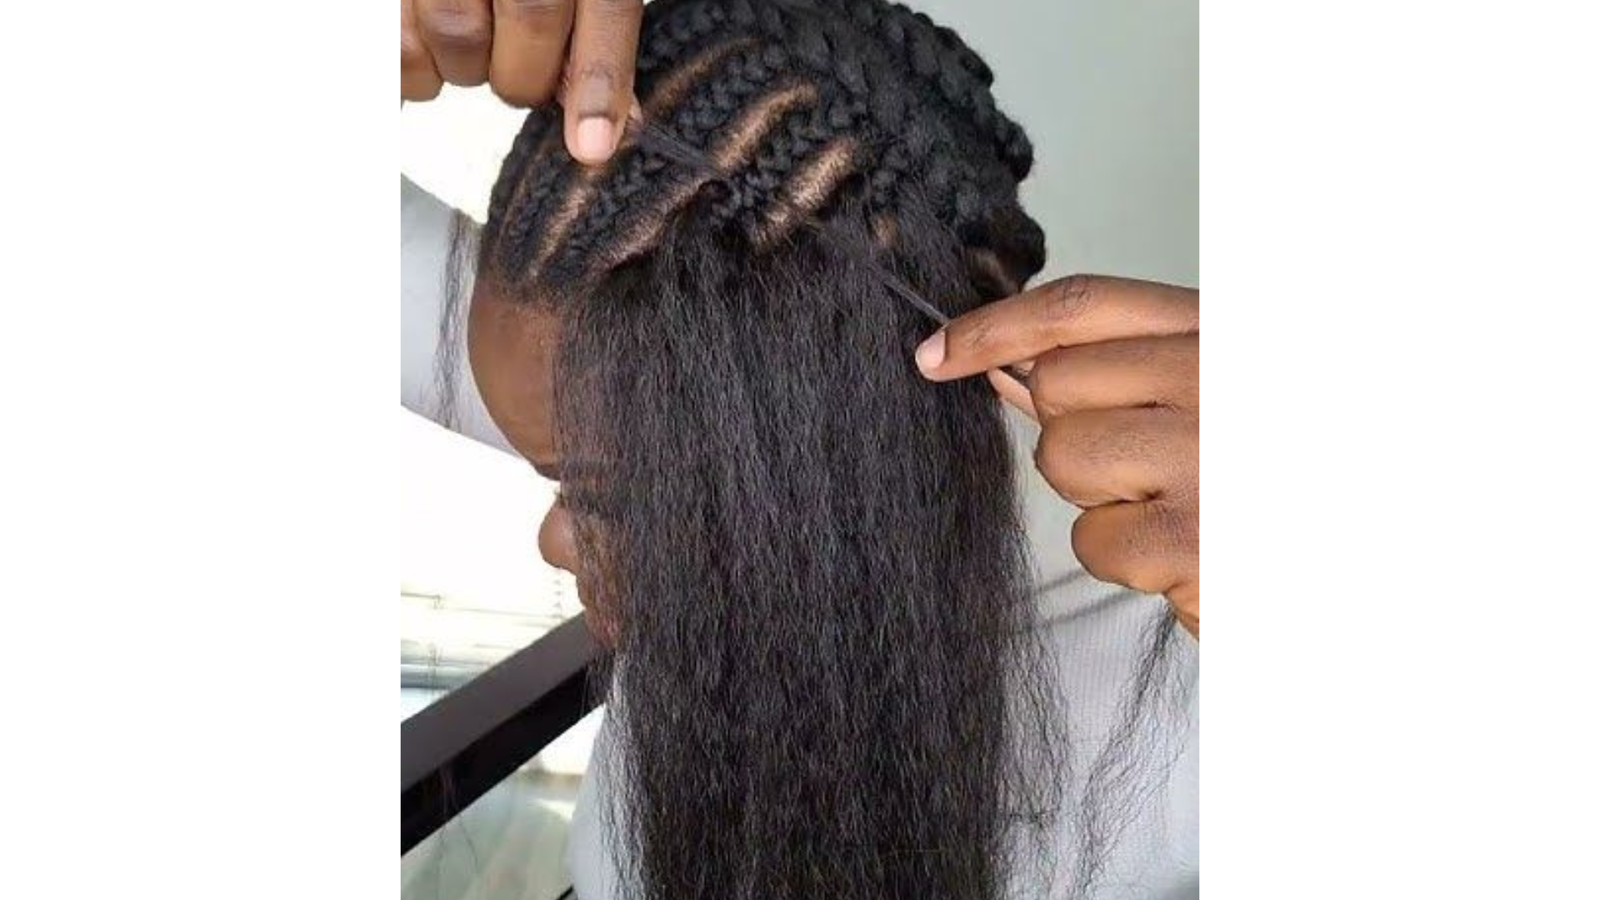
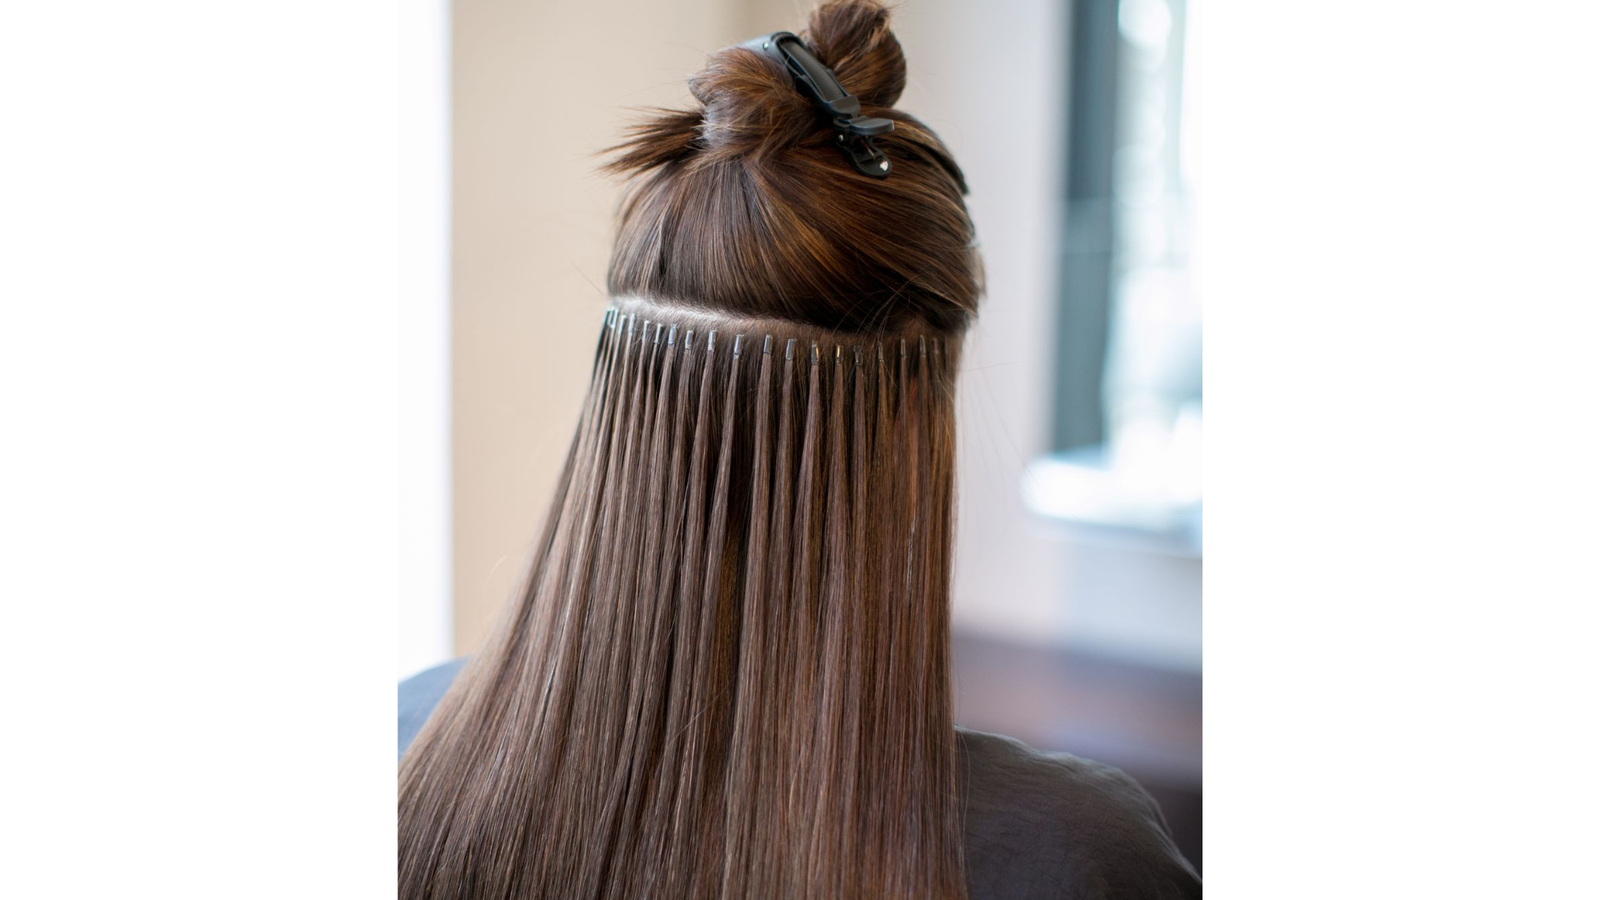
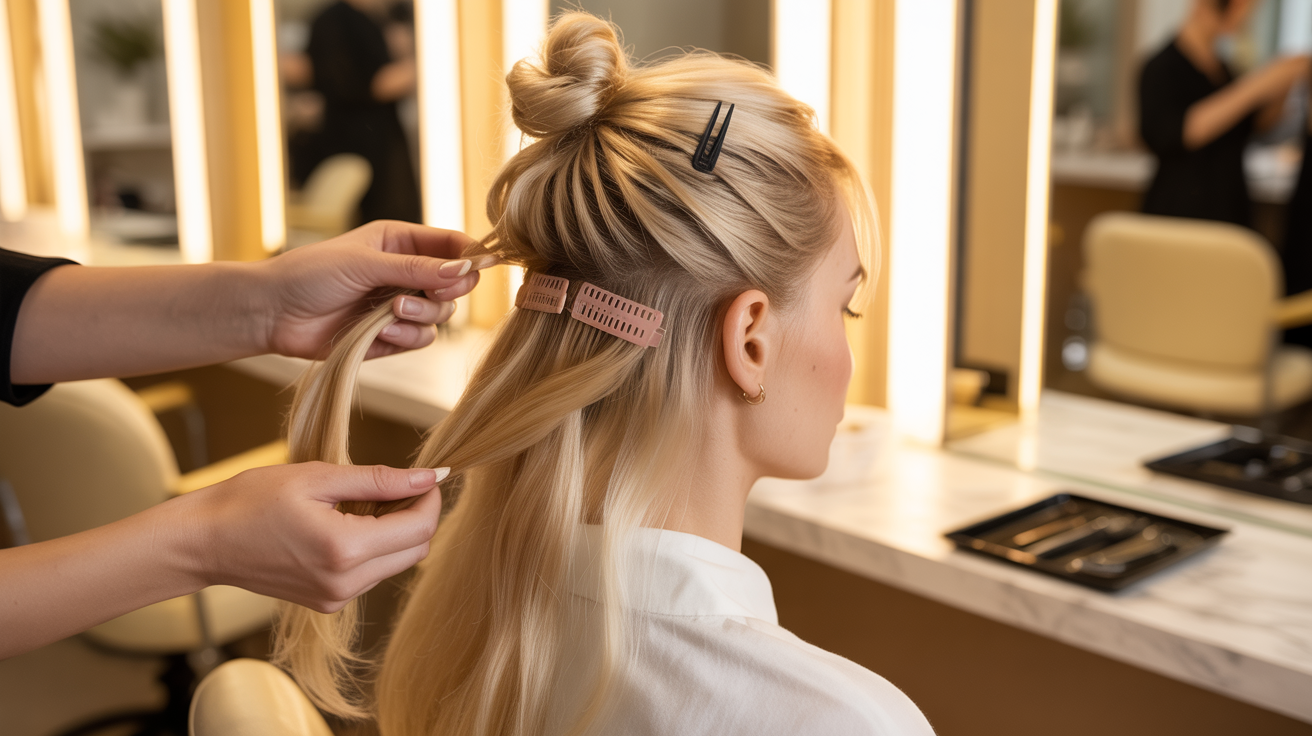
Step 1: Sectioning Your Hair Properly
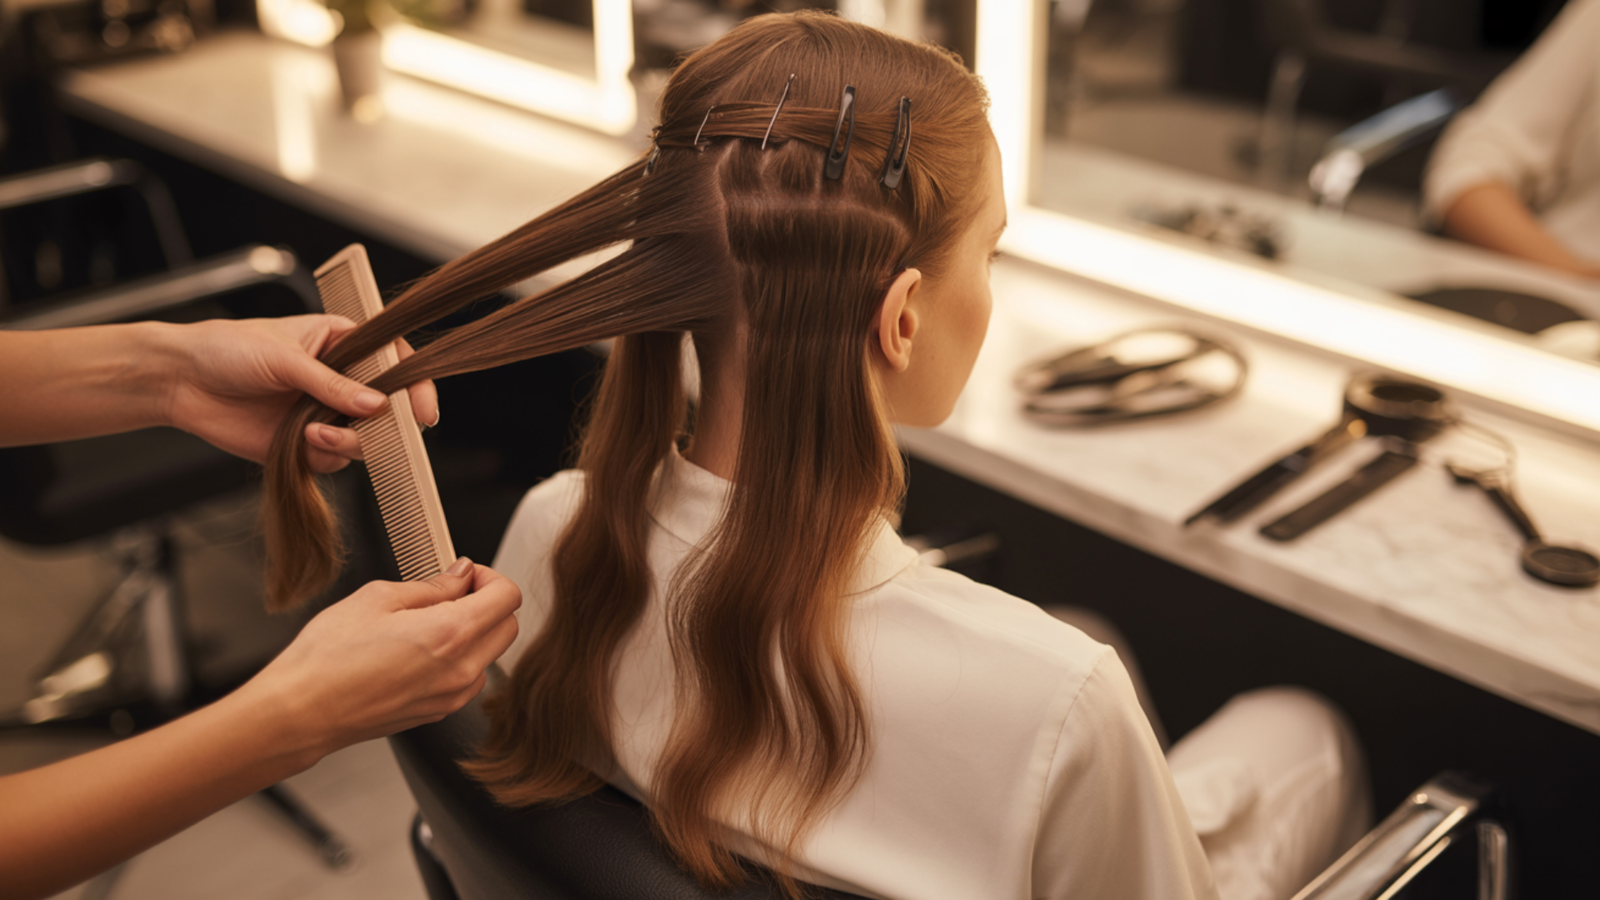
Divide your hair into top and bottom sections. The bottom section runs from the nape of your neck to the top of your ear.
Leave the bottom section down. Twist the remaining top section into a bun on top of your head. Use hairpins to secure sections out of the way so they don’t interfere.
Step 2: Creating Foundation with First Section
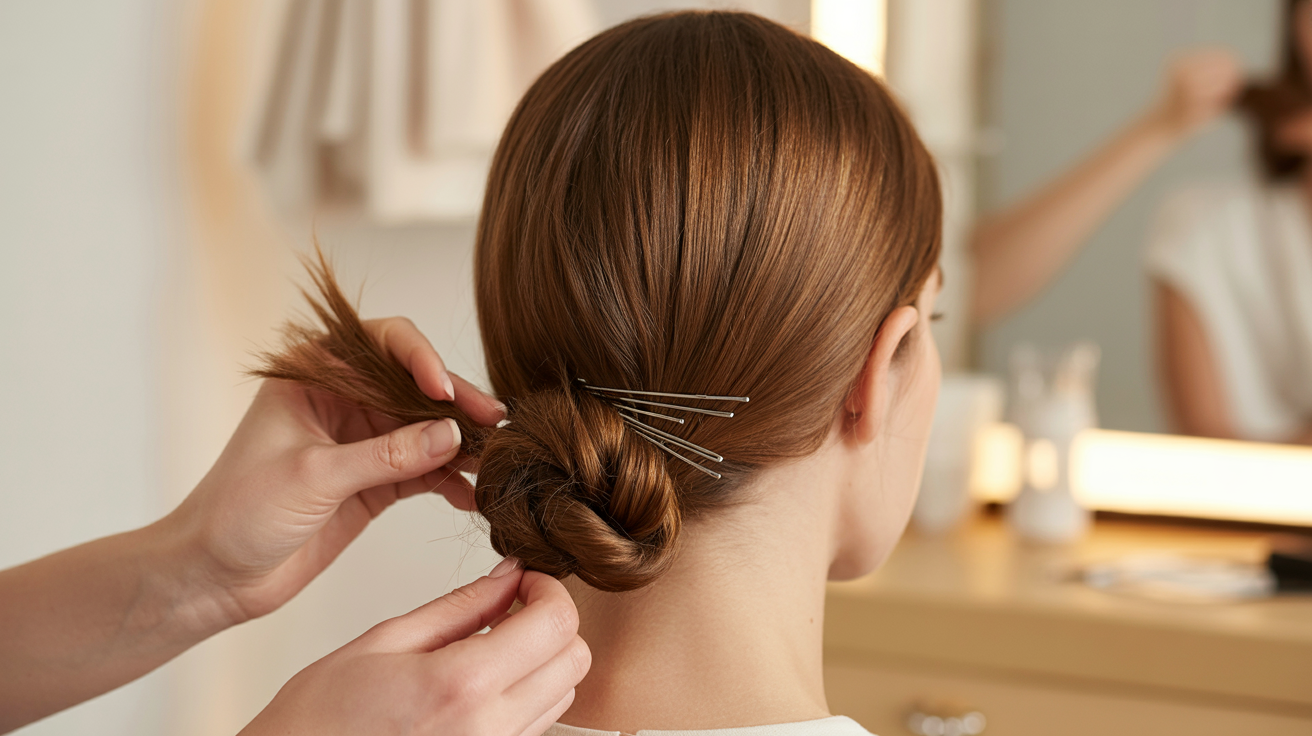
Plait the bottom section of hair. Tie it with a clear elastic band.
The braid should be secure but not overly tight. It must handle the weight of the extensions without slipping. Twist the plait around itself to create a small bun. Secure it with bobby pins for stability.
Step 3: Applying First Weft
Start with the middle clip just above the plaited bun. Make sure all clips are open before placing the weft.
Secure the two side clips behind your ears. Snap all clips firmly shut. Place extensions close to your scalp but not right against it. Detangle the wefts with an extension brush first.
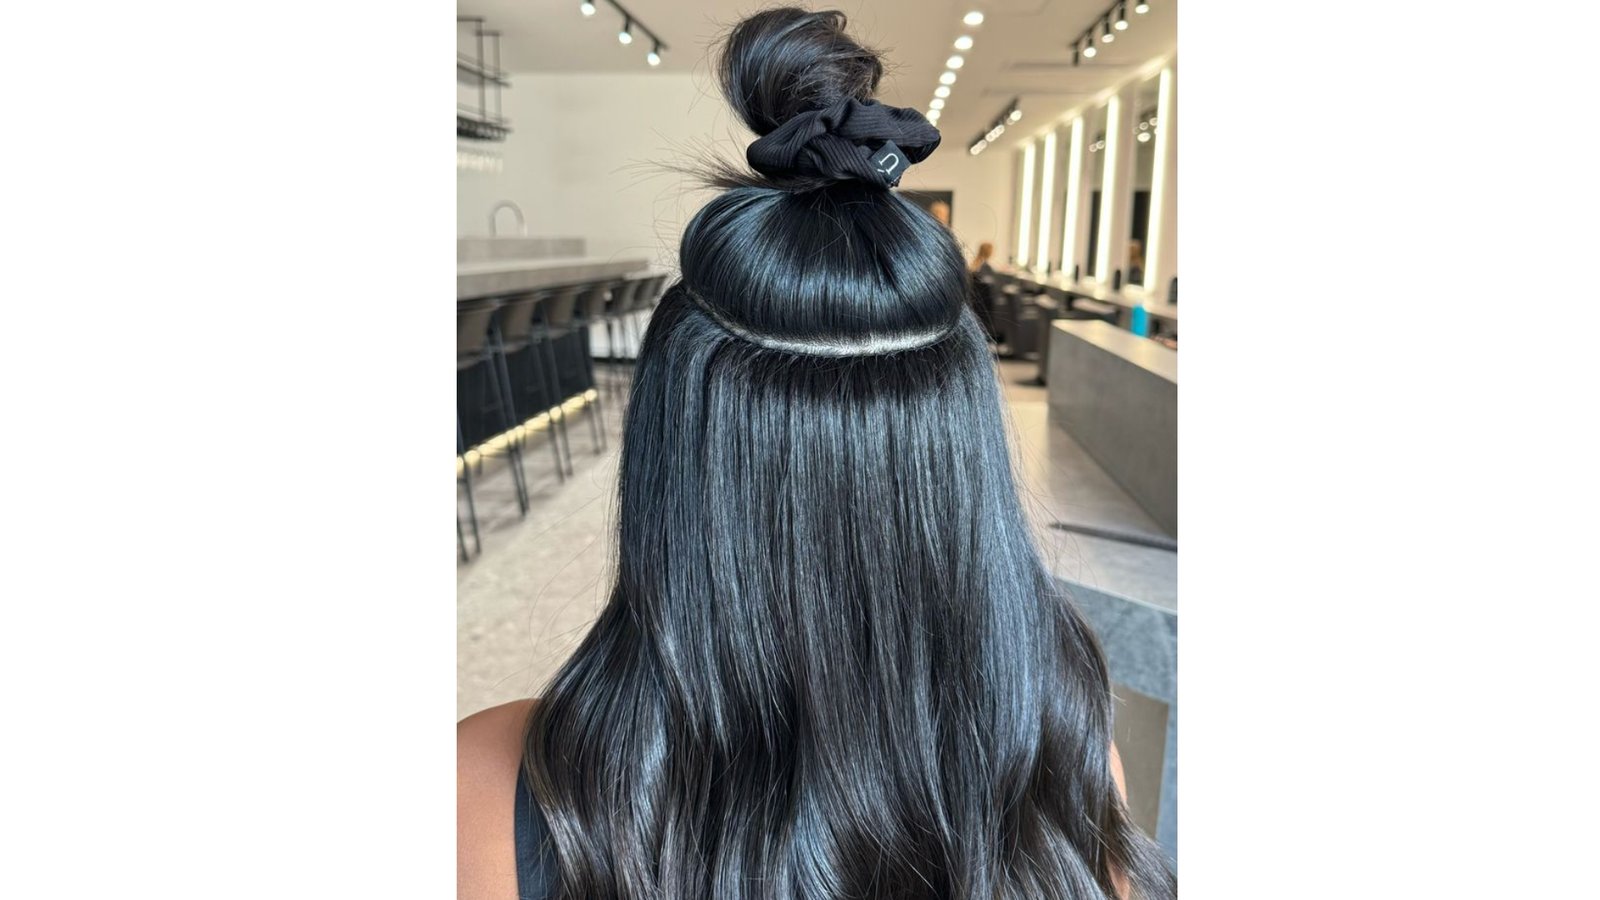
Step 4: Layering Additional Wefts
Section your hair one inch upwards from the last weft. Work from bottom to top, building layers.
Typically, start with two extensions in the lower sections. Use three pieces as you move up toward your crown. Each new weft hides the clips from the previous one. Don’t plait these sections, just layer them.
Step 5: Placing Wefts by Clip Count
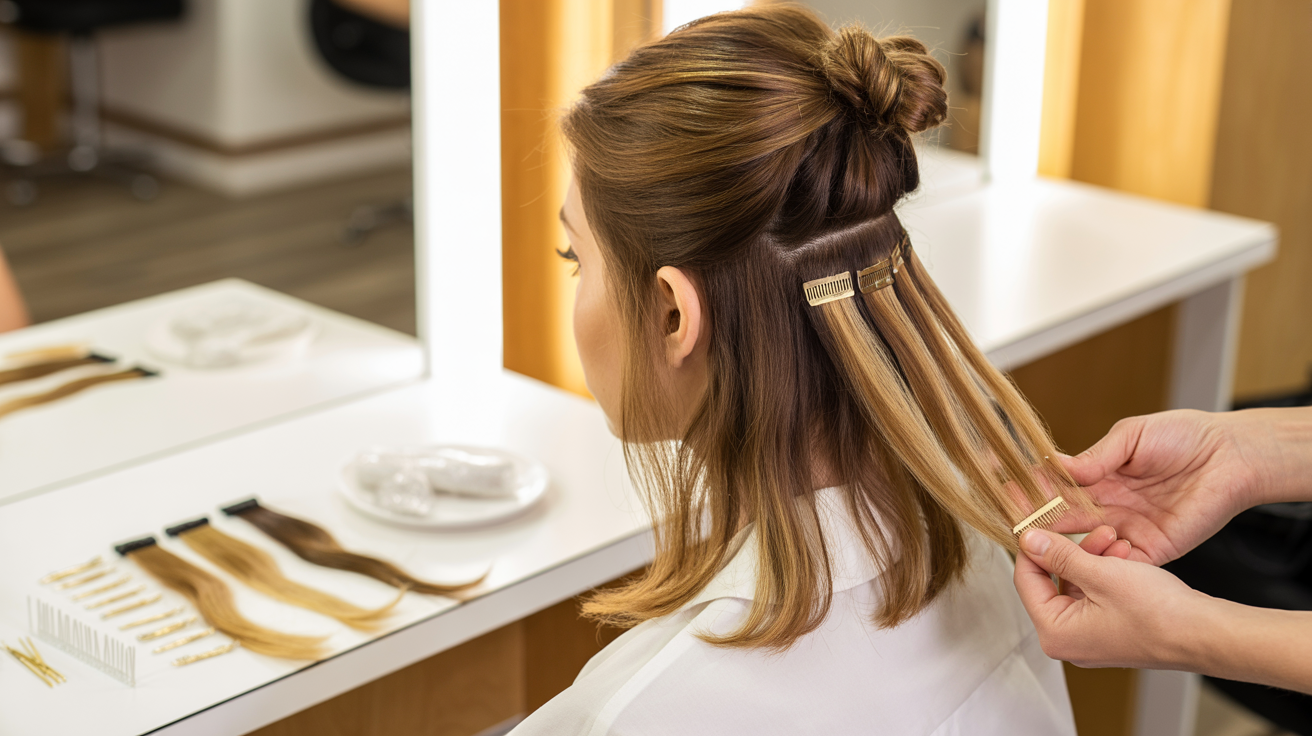
Five-clip extensions go on the widest part of your head. Two or three-clip wefts go toward the crown.
Strategic placement follows your natural growth pattern. Angle wefts along with how your hair naturally grows. Take small sections for a more natural look. Don’t try to cover your entire head with one weft.
Step 6: Final Blending
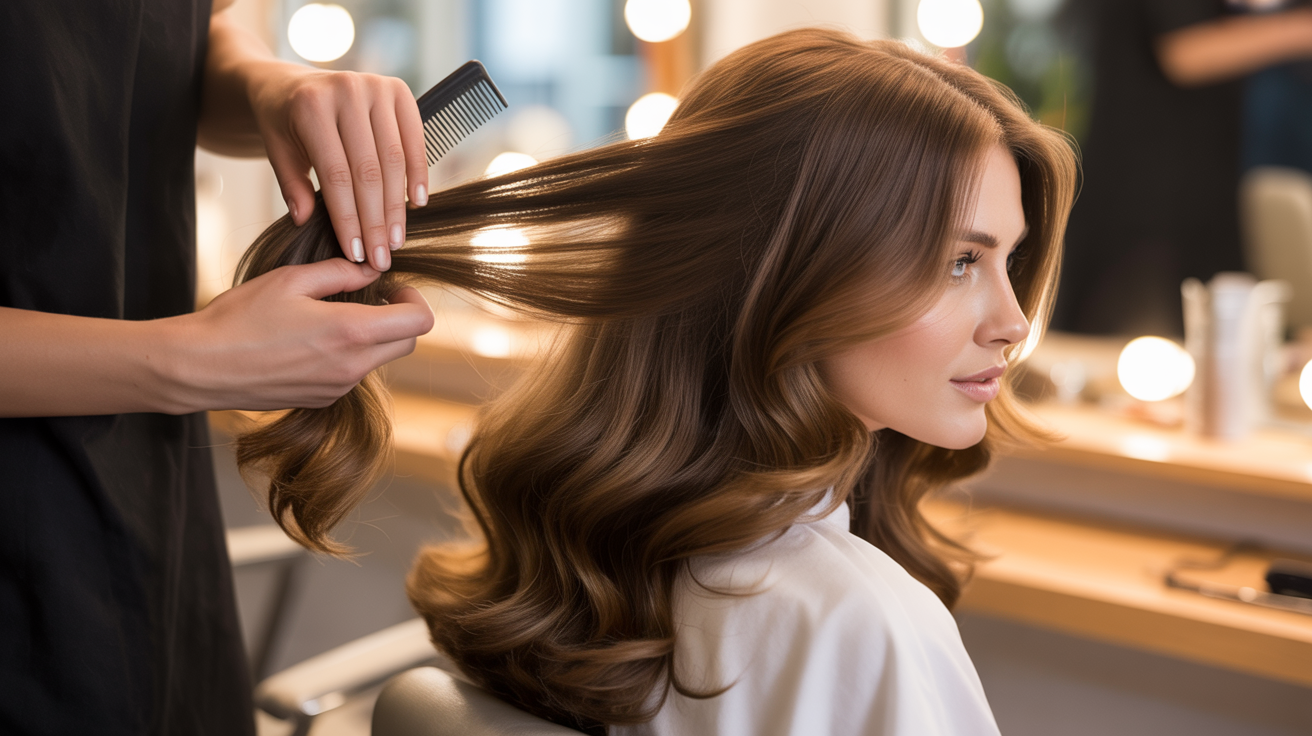
Gently comb through your hair once all extensions are in place. Blend your natural hair with the extensions to create volume throughout.
Smooth any visible lines where extensions meet your hair. Check all angles in the mirror. Make adjustments before you finish styling.
Common Mistakes to Avoid When Hiding Extensions
These common extension mistakes are easy to avoid if you know what to watch for, preventing obvious and uncomfortable results.
- Clipping Too Close to Scalp: Position clips slightly below the scalp to reduce tension and create a more natural look
- Clipping Too High on Head: Place wefts lower where you have more natural hair to cover them and avoid a choppy appearance.
- Using Freshly Washed Hair: Add texture with hairspray or tease roots since clean hair can be too slippery for clips to hold
- Using Too Many Wefts: Use only as many wefts as needed for short hair, often two to four, to keep the look natural.
- Choosing Wrong Extension Length: Stick to 12 to 18-inch extensions for short hair to blend with natural length and avoid obvious contrast
Strategic Placement and Angling Techniques
Extension placement is as important as type, with proper angle and positioning ensuring they blend naturally with your hair.
Following Natural Growth Patterns
Angle wefts along with how your hair naturally grows. Match the direction of your natural hair flow.
This creates seamless integration when styled. Your extensions move like your real hair because they’re positioned the same way. It looks natural even when the wind blows.
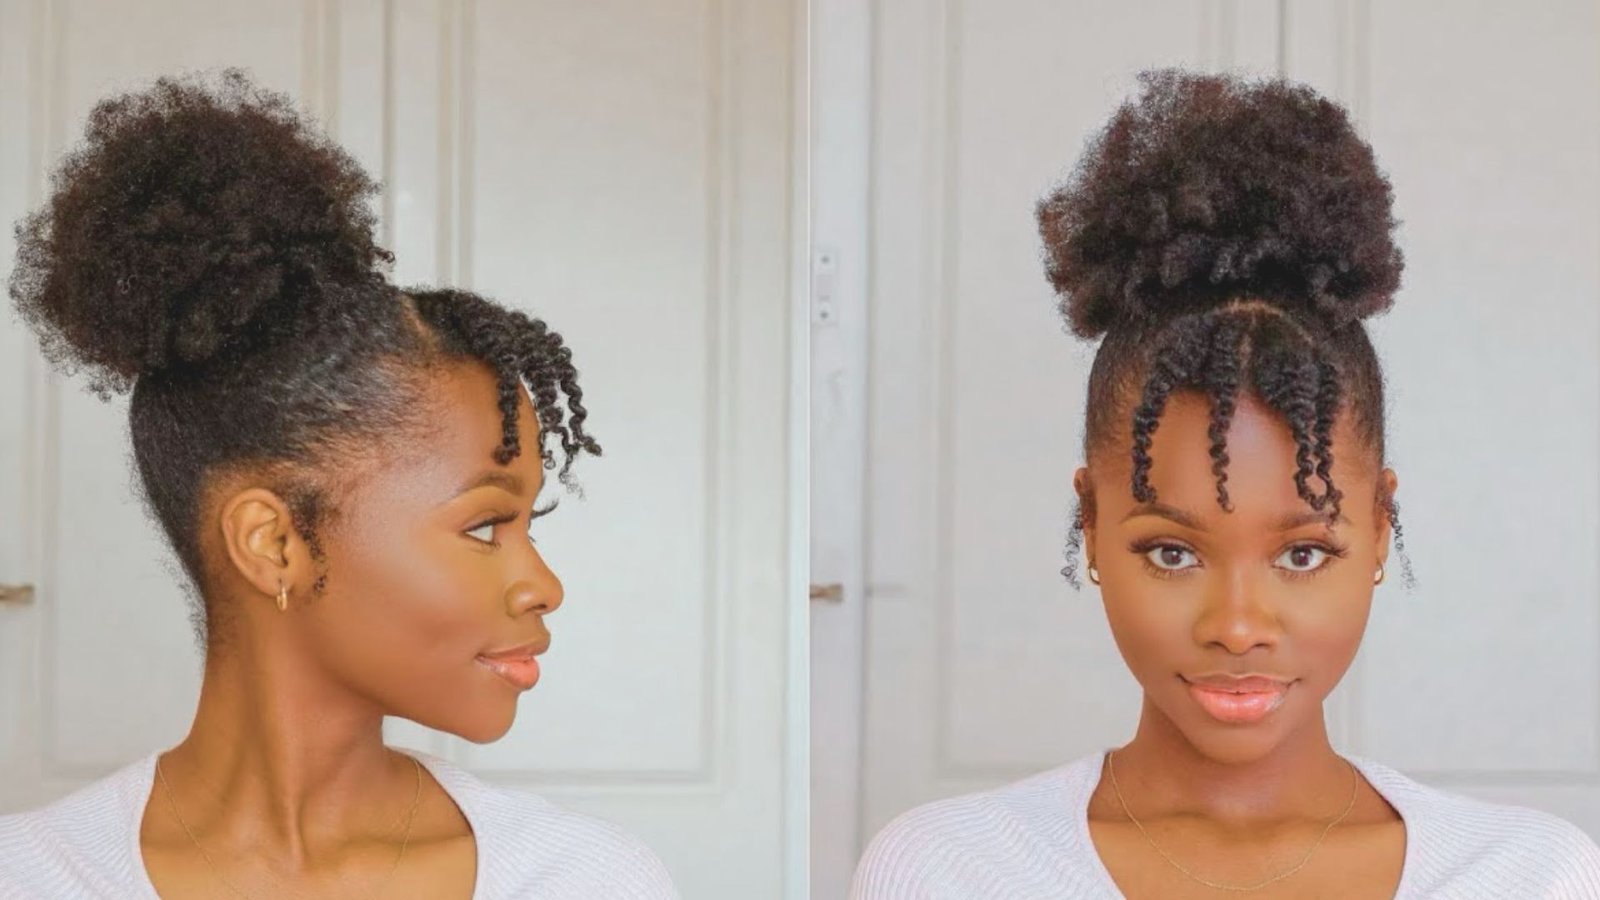
Layering for Natural Appearance
Layer wefts on top of each other instead of placing them all at the same level. Take small sections of natural hair between each weft.
This gives a more natural look overall. It prevents bulk in one area and distributes the extensions evenly. Your hair looks fuller without looking fake.
Positioning for Maximum Coverage
Place attachments where they’ll be hidden by layers of your natural hair. Use your hair’s natural layers to conceal clips and bonds.
Avoid placing extensions too close to visible areas like your hairline or part. Strategic positioning is the key to keeping everything hidden. Think about where your hair moves and falls naturally.
Styling Tips for Seamless Blending
Proper styling is key to blending extensions, ensuring they merge seamlessly with your natural hair for a natural finish.
- Hiding Extensions When Putting Hair Up: Start with textured hair and position extensions beneath natural hair, securing with pins and ties without pulling too tightly
- Creating Volume Without Revealing Clips: Tease at the crown, spray with hairspray, and smooth the top layer to add height while keeping attachments hidden
- Using Waves and Curls to Blend: Style natural hair and extensions together with waves or curls to create movement that conceals attachment points
- Half-Up Styles That Conceal Extensions: Pull the top section up and leave the bottom down to cover clips while maintaining a natural look
- Set and Secure: Finish with hairspray to hold the style in place and keep extensions undetectable throughout the day.
Conclusion
You now know how to make extensions work with very short hair. You need at least three to six inches of natural hair, the right type like clip-ins or tape-ins, and careful placement. Sectioning, teasing at the roots, and layering wefts help the extensions sit naturally.
Avoid common mistakes like clipping too high, using freshly washed hair, or choosing extensions that are much longer than your hair. Match the color and texture closely, and smaller wefts usually blend better than adding too many at once.
Practice helps. Your first attempt may take time, but you will get faster and more confident as you learn what works for your hair. The results are worth it when you finally see the length and volume you wanted. What has been your biggest challenge with short hair extensions?
Frequently Asked Questions
Can you put extensions in very short hair?
Yes, but you need at least 3-6 inches of hair length. This minimum length allows you to properly attach the wefts and hide the clips or bonds. Pixie cuts are typically too short for extensions because there isn’t enough natural hair to conceal the attachment points.
What type of extensions work best for very short hair?
Clip-in extensions are the best choice for very short hair. They’re easy to apply, remove, and adjust as your hair grows. Tape-in extensions, micro rings, and mini micro rings also work well because they lie flat and are lightweight, making them easier to hide.
How do you hide clip-in extensions in short hair?
Tease your hair at the roots for grip, section hair from bottom to top, and create a small plaited bun at the base. Clip extensions just above the bun, then layer additional wefts one inch apart. Use your natural hair to cover each clip layer.
Why won’t my extensions stay in my short hair?
Extensions slip in short hair when it’s freshly washed or when clips are placed too high. Use second-day hair or add texturizing spray for grip. Tease roots before clipping, position wefts lower on your head, and use bobby pins for extra security.
How long should extensions be for very short hair?
Choose extensions between 12-18 inches for very short hair. Ultra-long extensions are too difficult to blend naturally and make it obvious you’re wearing extensions. Shorter extensions create a more seamless transition and look more proportional to your natural length.